Instead of an actual cake this year I made these ‘His and Hers’ layered birthday cake cookies.
You see, the husband and I have birthdays five days apart. This all takes place during the Christmas holidays so as you can imagine there’s a lot of sweet stuff happening in a small amount of time.
It’s become a tradition. Following on the heels of Christmas I’m back in the kitchen whipping up a layer cake and then a few days later he’s doing the same for me.
By that point we’re both like Ugh… No. More. Sweet. Stuff…. (Well, not my daughter, she would live off cake if I’d let her). Then we pretend we’re only going to eat healthy from then on. And we do…for a little while anyway.
But this year we were away for Christmas. I’m not a fan of baking in an unfamiliar kitchen nor did I want to bring all my cake making paraphernalia so we decided to just skip the cakes this year. Which was just as well since we had a power failure and ended up cooking on a wood burning stove (an adventure in its own right).
Instead we bought some ’boutique’ ice cream for his birthday which we ended up eating all at once because I wasn’t going to let ice cream melt during the power failure and go to waste. That’s just wrong.
Then for my birthday we went out for ice cream taco sundaes. It was everything I wanted it to be.
But as much as I enjoyed the birthday ice cream I still felt the need for birthday cake. So I made these birthday cake cookies to fill that need.
The Cookie Cutter
I recently purchased this Ann Clark layered cake on a pedestal cookie cutter and I’ve been really looking forward to using it. You can make really cute birthday cake cookies or even fancy wedding cake cookies.
Ann Clark Layer Cake with Stand Cookie Cutter
&
How to Decorate Birthday Cake Cookies with Royal Icing
My idea for the ‘His and Hers’ birthday cake cookies was to take a similar design but alter a few elements to make them masculine and feminine. Pink and blue. Mustache and roses. Frilly cake stand vs plain cake stand.
Materials:
- Cake with stand cookie cutter
- Mustache template
- Parchment paper
- Black royal icing (20 second and medium)
- White royal icing (stiff)
- Hot pink royal icing (20 second and stiff)
- Light pink royal icing (20 second)
- Green royal icing (20 second and stiff)
- Yellow royal icing (stiff)
- Bright blue royal icing (20 second)
- Light blue royal icing (20 second)
- Red royal icing (20 second and stiff)
- Piping bags and couplers
- Round icing tips #1, 2
- Star icing tips #14, 16
- Scribe tool
Royal Icing Transfers
Before any cookies get made the royal icing transfers need to get done since they need a good 8-12 hours to dry.
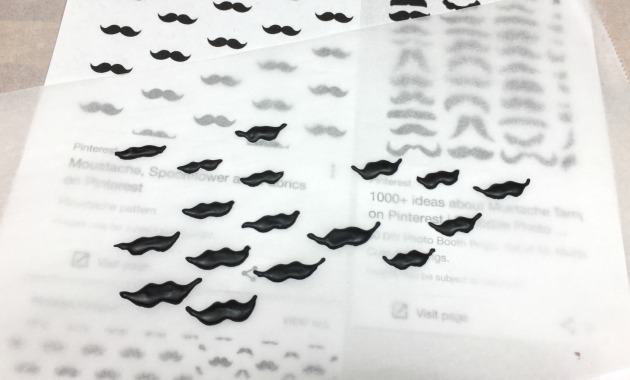
There’s no way I can evenly freehand a mustache so I just googled ‘mustache pattern’ and printed out one I liked.
Use a #1 tip and medium consistency black icing for this. You can use a scribe tool to help shape after piping.
Make more than you need because some will look better than others and some may break.
I also made some small swirl roses with the hot pink icing.
Begin by outlining the bottom cake layer with the light pink 20 second icing and a #2 tip. Give it a minute to set up and then fill it in (this will help prevent the icing from flowing over the edges).
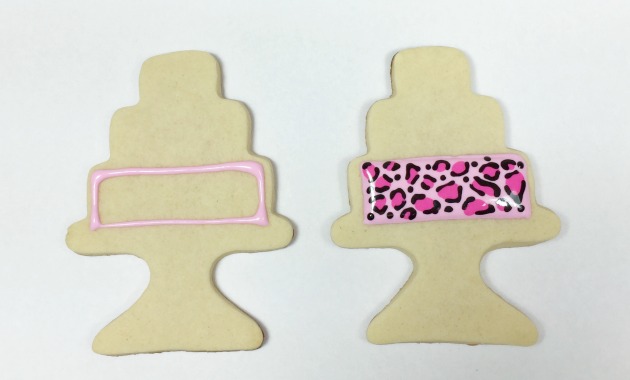
Right away pipe some hot pink spots with the 20 second icing a #1 tip. They should be irregularly shaped and spaced. Then take the black 20 second icing and a #1 tip to pipe a broken outline around the hot pink spots and add a few random black spots.
Do half your cookies like this with the pink icing and the rest of the cookies with the blue icing.
Let the icing set up for 20 – 30 minutes and then outline and flood the second cake layer.
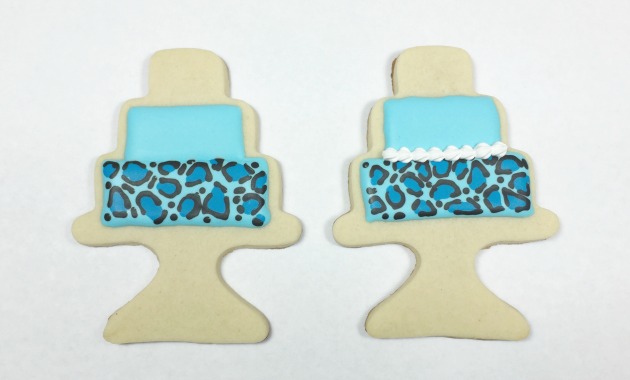
Let dry for a few hours (or overnight) and then take the stiff white icing and pipe a shell border with the #14 star tip.
Use a #2 tip and stiff consistency royal icing to pipe your candles. Start with the center candle and then pipe the candles on either side.
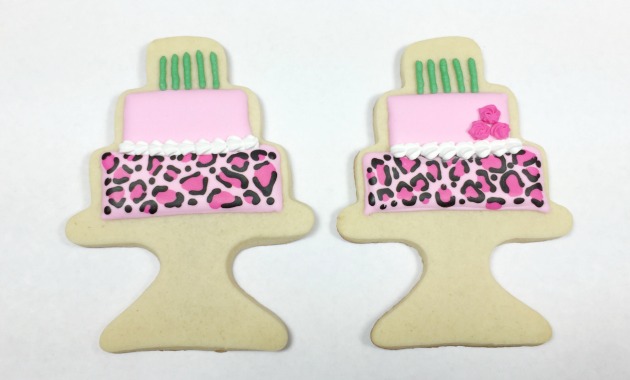
Using the same color icing as the cake layer, pipe a small dot of icing onto the back of your roses and position them onto your cookie.
Do the same with the mustaches on the blue cakes.
With a #2 tip pipe the flames onto the candles.
For the pink cake cookies, use a #2 tip and the stiff green icing to pipe little leaves around your roses. Make sure to anchor the icing then lessen the pressure and pull out to create the point.
Wait a few minutes then adjust the shape with the scribe tool if necessary. I added a central vein with the scribe point.
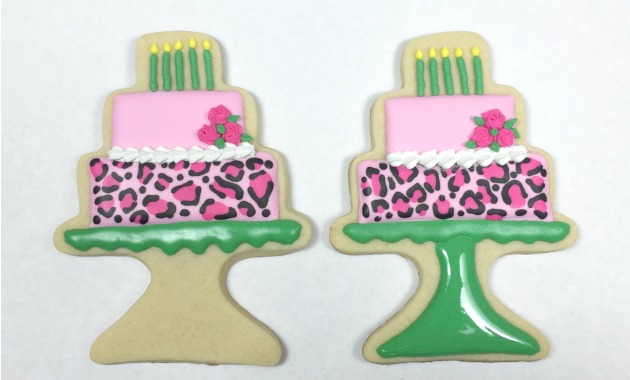
Thin the stiff icing to 20 second and pipe the top portion of the cake stand. Wait 20 minutes and then pipe the bottom portion (this creates some definition between the two components).
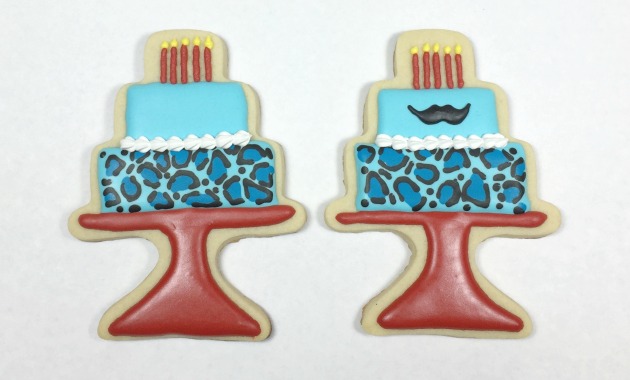
Repeat with the blue leopard cookies. You’ll see I did the cake stand all in one go for a simpler look.
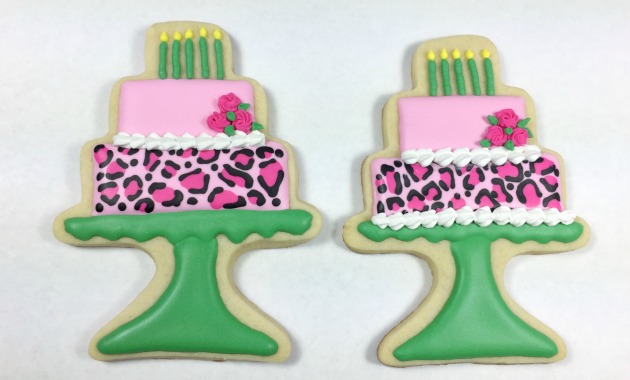
Allow the cookies to dry completely and then pipe a final row of shells along the bottom cake layer.
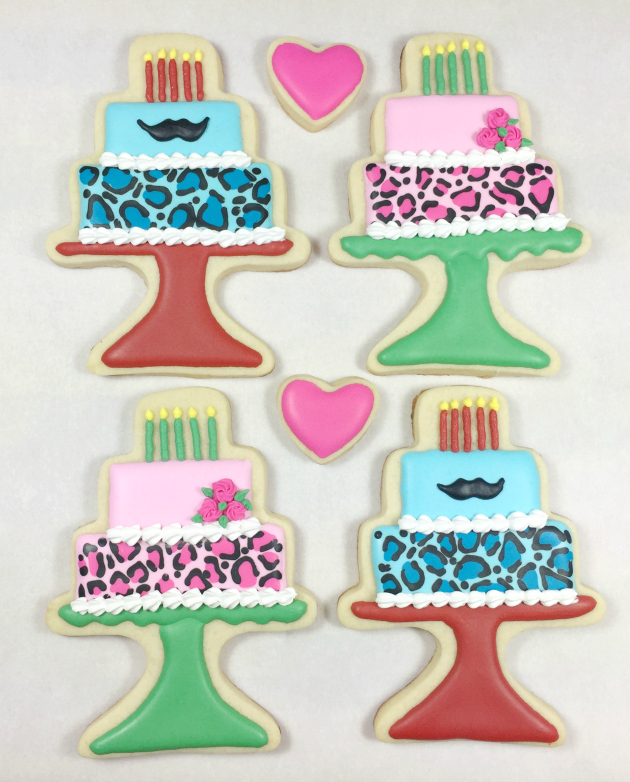
Share with your sweetheart and enjoy 🙂


Leave a Reply