I recently made these fun and cute plaid Easter bunny cookies for my daughter’s kindergarten class.
Let me tell you, I have a thing for plaid. Maybe it’s because I was a teenager in the ’90s where plaid was everything and everywhere. Plaid layered upon plaid.
Twenty years may have passed (um, how did that happen?) and many things have changed in my life but my love of plaid remains.
In this tutorial I’ll show you how to use the wet-on-wet technique to create plaid Easter bunny cookies in vibrant Easter colors.
I’ve finished off each cookie with a white sanding sugar tail for textural interest and embellished them with whimsical wildflowers.
Materials:
- Wilton Sitting Bunny Cookie Cutter – Comfort Grip
- Icing bags and couplers
- Round Piping tip #1
- Round Piping Tip #2
- Round Piping Tip #3
- Small Leaf Tip #65s (optional)
- Gel icing colors such as Americolor
- Scribe tool or toothpick
- Parchment paper
- Ruler
- Wilton roll ‘n cut mat
- Royal icing, 15-20 second and medium consistency.
- White sanding sugar or nonpareils.
Pretty Easter Color Palette
I just love these colors! I have to say I’ve become hooked on Americolor soft gel colors after years of favoring Wilton. I still have some favorite Wilton colors that I won’t give up but I’m gradually increasing my collection of Americolor gel colors.
I decided to use Easter as an excuse to indulge in a few new colors. Here’s the color palette I came up with using my new Americolor gel colors:
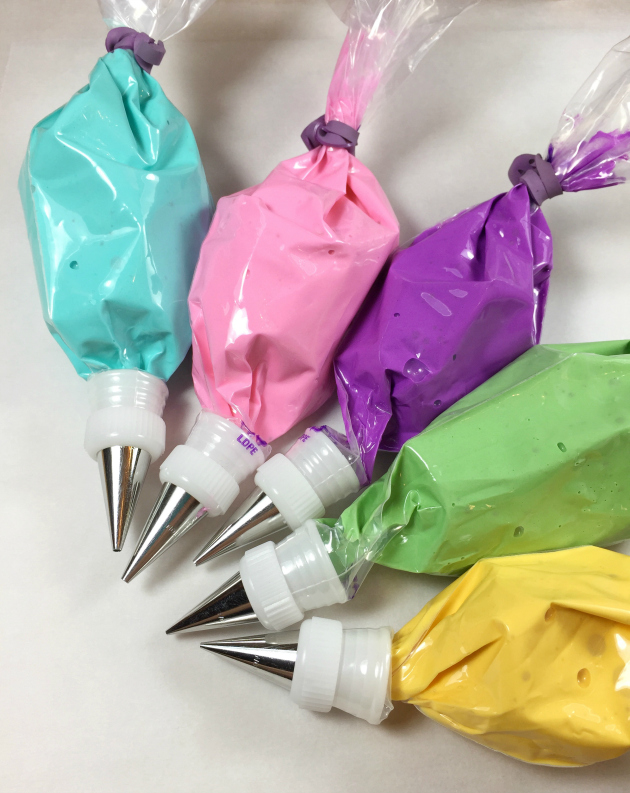
Turquoise: Not re-inventing the wheel here. This is straight up Turquoise and it’s gorgeous.
Strawberry Pink: Approximately three parts Deep Pink, one part Gold and a hint of Tulip Red.
Grape: Equal parts Electric Purple and Turquoise. I found the Electric Purple to have pink and yellow undertones so the addition of the Turquoise balanced it out nicely.
Greenery: Pantone’s color of 2017 is a gorgeous shade of green. Ever since I saw Lilaloa’s post on making Greenery colored icing I knew I just had to make it. Head on over to learn how to make it (hint: it uses a color I’ve used to make two other colors in this palette).
Goldenrod: Bright and cheerful. Mix two parts Egg Yellow and one part Gold.
How to Decorate Plaid Easter Bunny Cookies
If you want your plaid to be evenly spaced then you can’t really wing it. You’ve got to start with a grid.
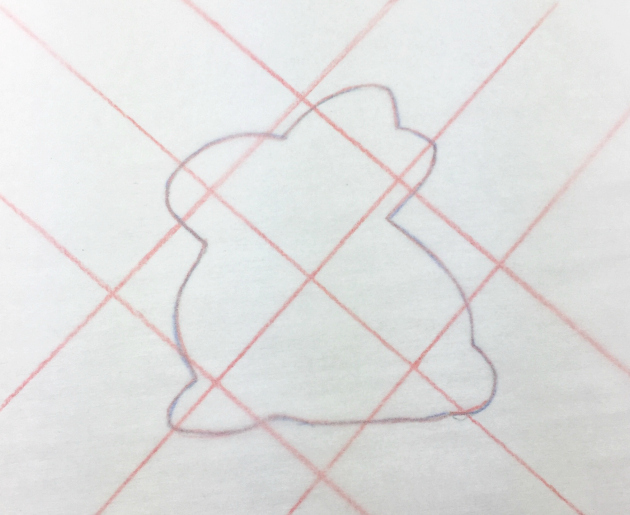
I made this grid by tracing my bunny cutter onto a piece of 8.5 x 11″ paper. I experimented with the spacing and decided that 1.5″ (3.8mm) spacing was best.
I used my Wilton roll n’ cut mat and a ruler to help create the grid. The lines on the mat are 1 inch apart so I drew the first and third line onto the bunny using the mat and with the help of the ruler made the second line in the middle.
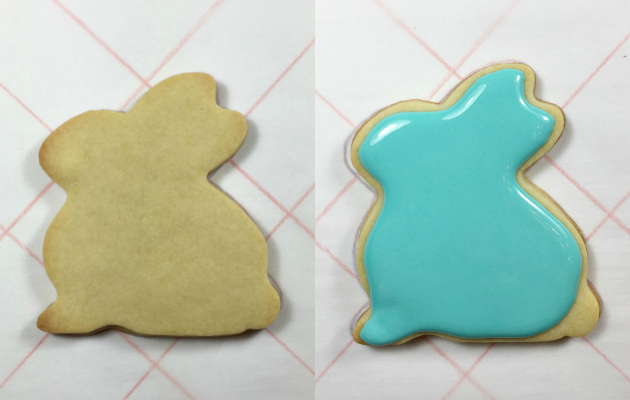
Place a piece of parchment paper over your grid.
For the plaid you will be using 15-20 second icing in one main color and two contrasting colors.
Using a round tip #3 outline and fill the cookie. Use your scribe tool to help evenly distribute the icing. Make sure you don’t go too close to the edge or the icing may spill over.
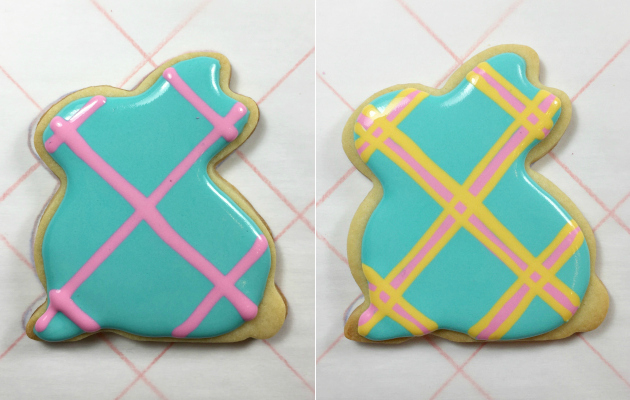
While the icing is still wet make your first set of stripes using a round tip #2. Right after make stripes on either side using your second contrasting color and a round tip #1. Use your scribe tool to adjust the ends of the lines as needed.
I can offer two pieces of advice to help keep your lines as even as possible:
- Slow and steady wins the race. It may be tempting to go quick but this can result in wavy lines (I’ve done a few of those).
- Try to use your peripheral vision so you can see the grid on either side of the cookie. Being able to see your starting and finishing points is much more useful than keeping the cookie in focus.
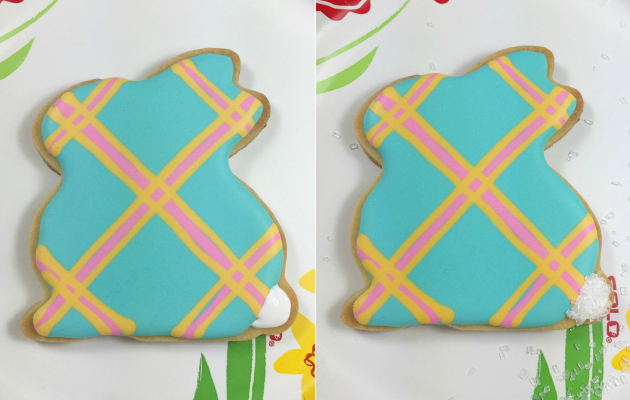
Let the cookie dry 8-12 hours or overnight. Fill the tail in with white 15-20 second icing.
Over a paper plate or a bowl immediately sprinkle with white sanding sugar (you could also use nonpareils). Shake off the excess and leave to dry.
If you use a paper plate you can fold it in half to funnel the sprinkles back into the container.
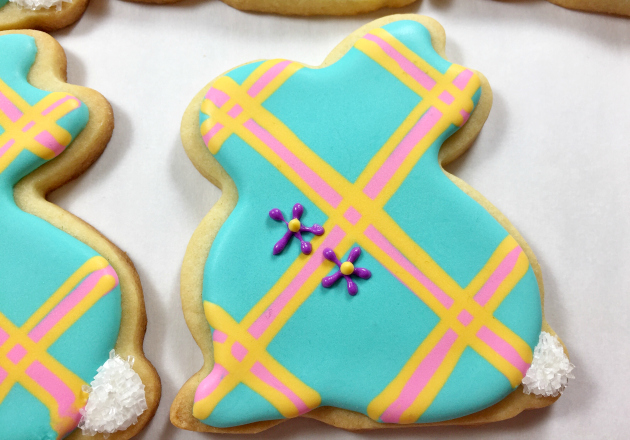
You can either leave your plaid Easter bunny cookies as they are or add some embellishments.
I decided to pipe some whimsical wildflowers using medium consistency icing (I just added icing sugar to the 15-20 second icing until I achieved medium consistency).
I piped the flowers and leaves directly onto the cookies but you could always do them onto parchment paper first and then attach them later.
I used round tips #1 & #2 for the flowers and tip #65s for the leaves.
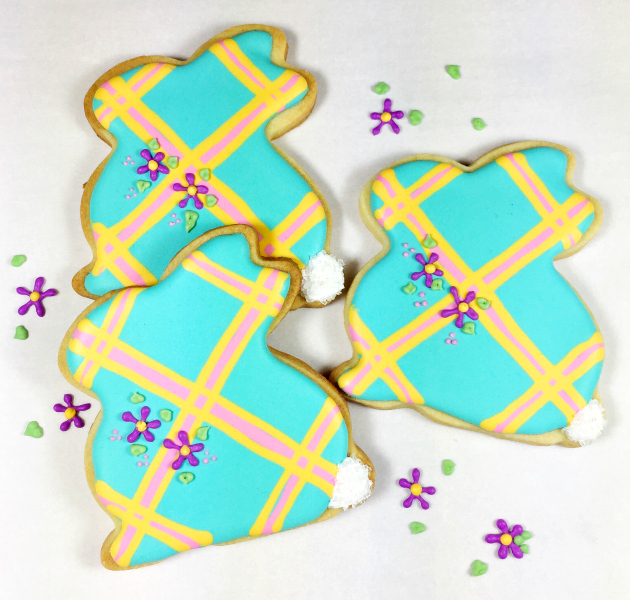
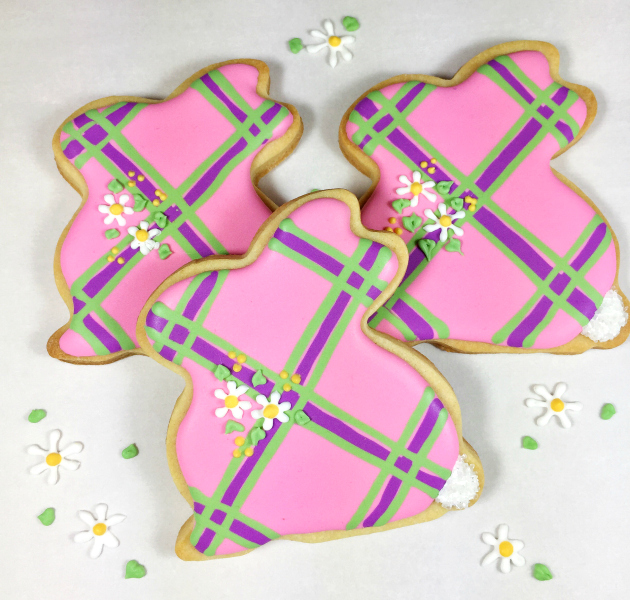
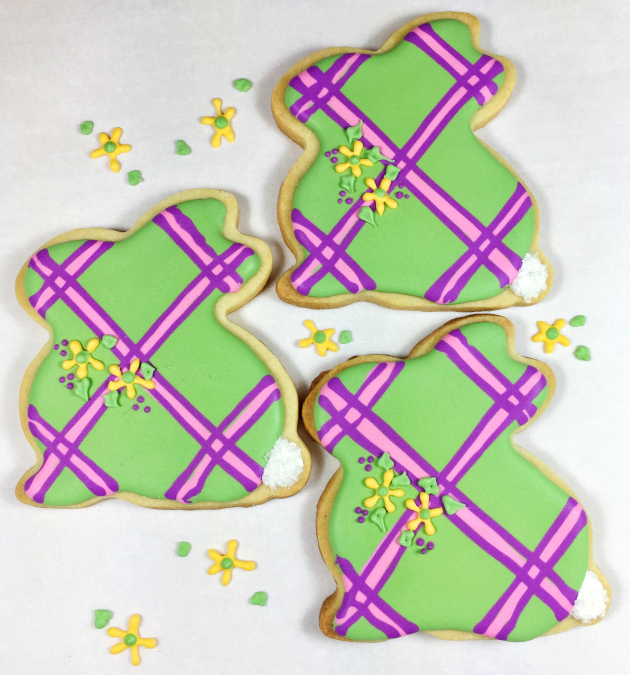
The cookies were a hit with my daughter’s class and the container came home empty 😉
Happy Easter!

Leave a Reply