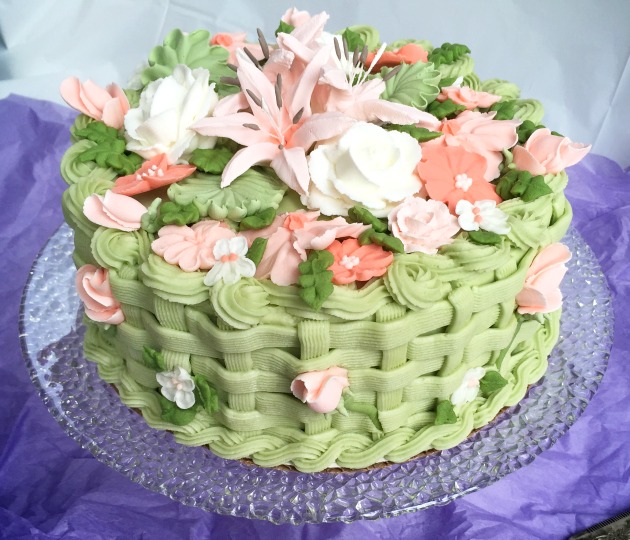
I was very excited to decorate the final cake for Wilton Course 2, Flowers and Cake Design. I always love to see how the techniques learned throughout the lessons come together to create the final cake.
(If you haven’t read it yet you can read my review for Lesson 1 and Lessons 2&3.)
What You’ll Need for the Wilton Course 2 Final Lesson:
- 8″ double layer cake. Crumb coat the cake using the same color buttercream you plan to use for your basket weave. If you don’t plan to cover the top of your cake completely with flowers then you will want to apply a thicker coat of icing on top.
- 10″ cake board (If you don’t want the cake board to show after you’re done you can cut it down leaving 1 cm exposed for your border. I left slightly less and had to use a smaller tip to squeeze my border in.)
- 4.5 – 5 cups of buttercream (this includes the icing used for your crumb coat). Set 1/2c aside and tint green for your leaves and vines and tint the rest your color of choice (it’s important to use the same color for your crumb coat as your basket weave so that any spaces won’t be noticeable).
- Cake Turntable. I highly recommend you buy one for this class if you don’t already have one.
- Tip #47 (comes with kit) or Tip #48. I used tip #48 for my cake because it’s larger than tip #47 and in my opinion more proportional for a cake. I think tip #47 will be better suited for cupcakes.
- Bring all your tips from Course 1 and Course 2.
- Disposable decorating bags and couplers.
- Your course manual.
- Spatula.
- Cake carrier for your final cake.
- Extra flowers from home (if you made them during the week).
For this cake I chose to use Wilton’s buttercream recipe. Normally when I make buttercream I’m a bit of a purist and don’t like to add shortening. But, with my tendency to have hot hands and no fridge available to rescue my cake I decided to follow the recipe as is and add the shortening for stability. Let me tell you this recipe is delicious! It tastes like vanilla ice cream and you’ll want to eat it by the spoonful (ok, yes, I did this a little). It was perfect and I had no melting problems the whole time I iced this cake. I was a bit paranoid of running out of icing so I made 3 times the recipe, about 6 3/4 cups, and I ended up freezing 1 recipe’s worth later. Double the recipe should be sufficient. In case you’re wondering, I used Wilton’s Moss Green gel color which is now my favorite green to use.
What You’ll Learn During the Final Lesson
Lesson 4 is exciting because in addition to learning how to arrange the flowers created in lessons 2 and 3 new buttercream techniques are tought and used to create a beautifully designed cake. Specifically, you learn to weave a buttercream basket around the cake and then embellish it with the rope border and reverse she’ll border.
Basket Weave Technique
The basket weave technique may look very intricate and intimidating but once you learn the pattern it’s actually not that hard.
The first thing you need to do is divide your cake. These divisions mark where your vertical ‘stripes’ will be and the quantity of divisions will depend on the size of your cake. For this 8″ cake I divided the cake into quarters, then eighths. Then each eighth was divided into thirds resulting in 24 divisions around the cake. (Don’t worry about the division marks showing on the top of the cake, that will get covered up later).
You’ll get a chance to practice the basket weave pattern on your practice board and when you’re comfortable you can move to your cake.
One thing I will mention is to pay attention that you’re keeping your horizontal ‘stripes’ level. If you find it starts getting hard to squeeze your bottom stripe in, that means your stripes are sinking and need to be corrected. This started to happen to me, so I corrected it gradually and that spot became the back of the cake.
Once your basket weave is complete you will learn two new borders.
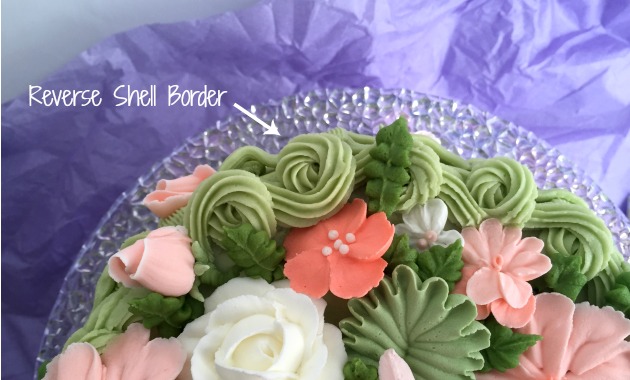
Reverse Shell Border
The reverse shell border is now my favorite border. It’s so pretty and fairly easy to do. This technique combines a rosette with the shell technique resulting in an elegant edge for the top of your cake. Since you have to alternate the direction of the rosette the trick is to pay attention and make sure to keep track of which direction you’re using.
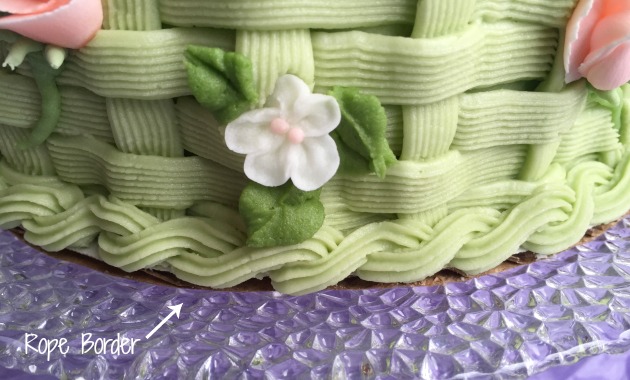
Rope Border
The rope border was a bit more challenging for me. Since I didn’t have a lot of space I knew I would have to use the smaller #18 star tip. I tried many times on my practice board but couldn’t get the pattern right. My instructor suggested I switch to tip #21 for practice and I got the pattern right away. When I switched back to tip #18 I could do it properly. So, if you’re having trouble with one tip, it may help to try using another.
Putting It All Together
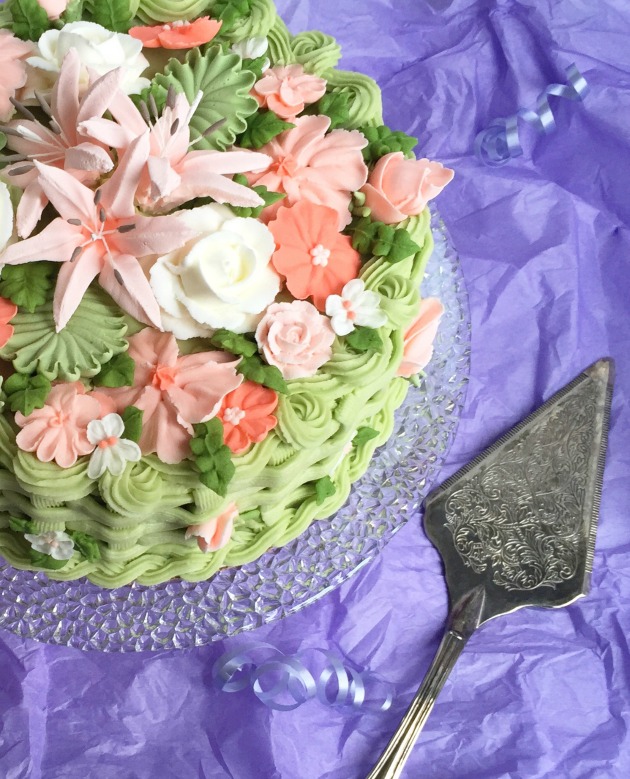
After piping the basket weave and borders it was time to arrange the flowers. Although I’m usually partial to an asymmetrical arrangement this time I ended up using a somewhat symmetrical approach. Blobs of buttercream were applied where flowers needed a little height or needed to be angled.
Since I had so many flowers it was a bit challenging deciding which ones made it on the cake. I worked from the centre outwards arranging and adding flowers until I was happy with the look. I pressed the rosebuds, half roses and violets into the sides of the cake.
Once all of the flowers were arranged it was time for the finishing touches: piping the final buttercream leaves. I had chosen Moss Green for my cake so for the extra leaves I mixed more gel into my buttercream to create a darker shade.
Conclusion
While this course is way more intensive than the first course it’s very rewarding. You definitely need to have extra time available outside of class to practice the techniques to get the most out of this class. At the time of writing I’ve actually completed courses 3 and 4 (reviews coming soon) and can say this is the most intense of the four courses. So if you can do this course you can do anything.
Overall I’m very pleased with this cake. I’m glad I made extra flowers so I had more to pick and choose from and I’m glad I made some white flowers to lighten up and balance out the more vibrant shades.
I would highly recommend this course, but you need to make sure you have the time to commit to it.
Thanks for reading. Stay tuned for my course 3 review.


First of all I want to say excellent blog! I had a quick question that I’d like to ask if you do not mind.
I was curious to find out how you center yourself and clear your
thoughts before writing. I have had a difficult time clearing my thoughts in getting my thoughts out.
I do take pleasure in writing however it just seems like the first 10 to 15 minutes tend to be
wasted just trying to figure out how to begin. Any ideas or tips?
Thanks!
Hi there, sorry for the tardy reply. Thanks for the interesting question. For me I find knowing what I’m going to be writing about before I sit down to work is key. If I sit down first and then try to work out what to blog about I end up wasting time. But if I know what I’m going to post about and have all my images edited in advance, then I can just sit down and get to work. I’ve got a 3 year old so I don’t get that much computer time and I find it’s important to make the most of it. Hope this helps 🙂
Simply gorgeous cakes, stunning!! I will definitely come back here when I’m ready to try a project!
Thanks Kalina 😉