It’s taken me a little while to get this typed up but, as promised, here is my review for lessons 2 and 3 from Wilton Course 2: Flowers and Cake Design. If you haven’t read it yet you can find my review from lesson 1 here. Instead of completing two separate classes we combined lessons 2 and 3 into one four hour class.
After finding the first class to be very challenging I was pretty nervous for these lessons. My biggest issue was the petal shape and most of the flowers being taught were based on this formation. But it turned out to be a good thing that my instructor had me go ahead and practice petals and the rosebud in the first lesson because all the practice paid off and lessons 2 and 3 weren’t nearly as difficult as I expected them to be.
I spent a lot of time during the week practicing the techniques from the first class, making royal icing and also preparing for lessons 2 and 3 (much more time than was required during the first course).
Materials for Lessons 2 & 3
In addition to the items mentioned for the first class (except for the decorator icing) you will need:
- Parchment paper squares
- Empty egg container
- Foam or plastic cup
- Squeeze bottle (for water to dilute the royal icing)
- 3 recipes of royal icing (1 for lesson 2 and 2 for lesson 3)
- Scissors (to trim lily stamens)
Preparing for Lessons 2 & 3
In order to maximize time (and materials) I did some preparation for the lessons.
Laminate Flower Templates – First, I decided to get my flower templates laminated. I figured this was the easiest route instead of buying one flower nail for each template or buying more templates when the included ones got destroyed. I chose 5 mil laminating plastic and it only cost $5 for the whole lot. The guy at the copy shop stuck them individually onto the sheets and at the end I had to cut them out leaving a small border of plastic around each one.
Prepare Materials – I cut up a bunch of parchment squares and assembled seven disposable decorating bags with couplers so I wouldn’t have to mess around with this during class.
Mix Icing Colors in Advance – I’m really glad I decided to mix all my colors in advance because it took about 2 hours to get everything exactly as I wanted.
I was really inspired by the monochromatic purple cake on the cover of the course book. But I also knew I didn’t want my cake to be just one color. So I decided to make all my flowers monochromatic and have a contrasting color for the cake. After poking around the ‘net I found myself really drawn to the color combo of coral and mossy green. I didn’t want to fuss with mixing colors to get the coral so I ended up using the Wilton gel colors ‘Creamy Peach’ and ‘Moss Green’. Using the technique I learned during course one, in order to get the green to look nice with the peach I mixed a little peach (about teaspoon) in with the green.
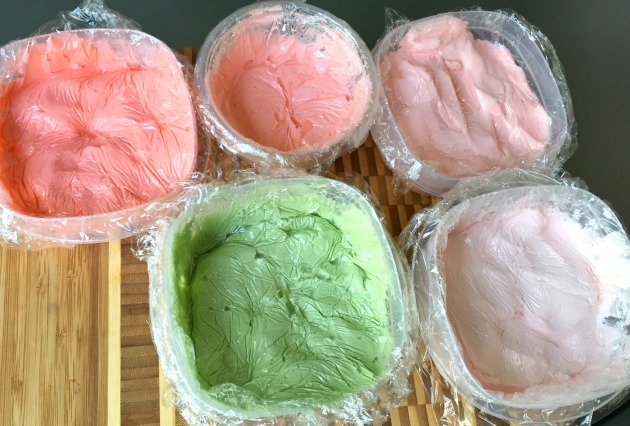
Here’s what it looked like after mixing to get the right shades:
In case your wondering, this is three batches of royal icing divided accordingly:
Moss Green – 2 cups
Very pale Creamy Peach – 1.5 cups
Pale Creamy Peach – 1.5 cups
Creamy Peach – 1.5 cups (only one portion shown here)
Dark Creamy Peach – 1 cup
Because it took me so long to create the exact colors I wanted, and because I wasn’t sure how much would be wasted while I practiced my technique, I decided to make a fourth batch of royal icing and keep it white.
Looking back, I have two things to say about this color scheme. First, I just adore the colors but I found the darkest creamy peach was much more intense than I had intended, almost bordering on fluorescent. I wanted darker, not brighter. In hindsight I would have mixed less of this color and perhaps added a little brown to mute the color a little.
Second, I highly recommend having some white royal icing on hand. This way you have flexibility to either add an additional color if your think it would benefit your final cake, or you can make some white flowers to lighten things up. Because my colors ended up brighter than expected I made all my roses in white and I think it really helped lighten up my final cake (you’ll see this in the next post). But I don’t think you need to go so far as to make an extra batch of royal icing. I had LOTS leftover. Perhaps scale back the quantity of some of the other colors and leave yourself 1 cup white.
Definitely wait to fill your decorating bags until your instructor has a chance to check your icing consistency. Your version of medium or thin may be different from theirs.
Lesson 2 – Roses and Appliques
Wilton Rose – We jumped straight into the lesson with the Wilton Rose. Fortunately I got to learn this as a bonus during Wilton Course 1 even though it wasn’t part of the course. It was pretty easy to do with royal icing. But even if you haven’t learned this yet I think it’s pretty straight forward and easy to pick up once you see it done firsthand. But plenty of practice is what’s important. Plus looking at real roses to help with your technique.
Rosebuds and Half Rose – Having worked on these the previous week I was amazed at how much easier these were to do. I’ve got to say how much I love that royal icing doesn’t heat up when held the way buttercream does. Makes it so much easier to form petals. The one thing we did differently this time though was add a stem and calyx. I did five of each and left them on my practice board to dry.
Royal Icing Appliques – We practiced the appliques for a little while. Even though I had no plans to use them on my final cake I found this to be a useful technique, although I’ll have to work on it a little bit more to get my lines and connections as smooth as I’d like.
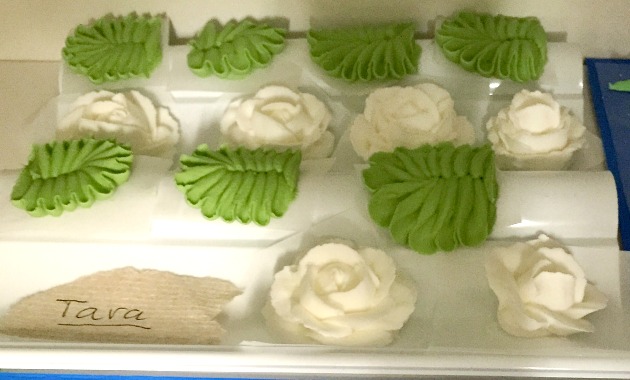
Sorry for the weird angle and poor lighting but I had to take the photos after the flowers had been put into the store cupboard to dry. These are my full roses and the violet leaves from lesson 3 drying on the wave flower former.
Lesson 3 – Flowers & Leaves
Violet Leaves – Using tip 104 and the flower nail (no template required) we practiced violet leaves. These are gorgeous leaves and I just love them but I did find it challenging to keep the icing tip at the optimum angle. I also tried these at home using the smaller 101 tip. Visually I preferred the smaller leaves on their own but interestingly I preferred the larger leaves for the cake. Maybe the smaller ones are better suited for cupcakes.
We skipped over regular leaves with the 352 tip since this was taught during Course 1 Building Buttercream Skills but I did do some at home for practice. We also didn’t do stems with royal icing because my instructor prefers to do these at the end in buttercream. It makes sense to do this so that you can add embellishments at the very end to your final cake.
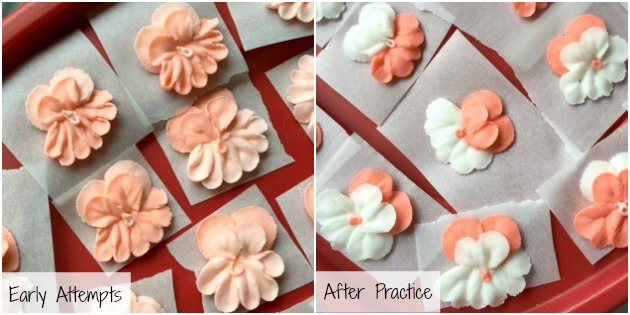
Pansies – Pansies are one of my favorite flowers so I was very excited to learn how to make them. In the manual the diagram shows completing both layers of top petals before piping the ‘skirt’ at the bottom. My instructor showed me a different (and I think easier) way where you pipe the first layer of top petals, then do the skirt, followed by the final two top petals and flower center. For me, the ‘skirt’ part was the most challenging part to work on. Initially my skirts were insane with too many ruffles but I continued to work on them until they flowed nicely.
Violets – The violets are such cute little flowers. They did turn out to be much smaller than I expected given the size of the violet leaves. These were pretty easy to learn and required a tip I had never used before (tip 59s, 101s for lefties).
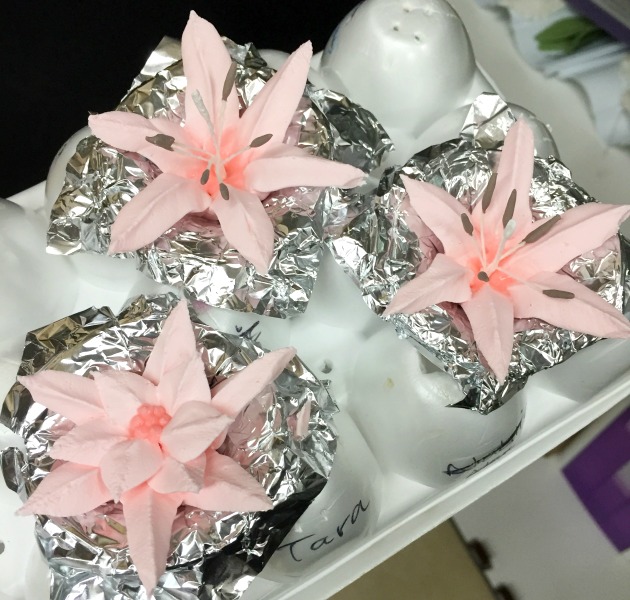
Lily – Lilies are another one of my favorite flowers whether they are vibrant tiger lilies or delicate Easter lilies. Needless to say I was very happy to learn how to make them. There are two lily nails in the student kit which in theory limits you to making two at a time. But I learned a handy little tip from my instructor. If you turn an empty egg carton upside down, then you can gently ease the tinfoil off the lily nail and then place it in between the egg cups to dry. A carton that held a dozen eggs will comfortably hold three lilies (or poinsettias) to dry. Another important thing is to have a foam or plastic cup. You can poke a hole in the bottom and use it as a resting spot for your lily nail while you change piping bags or get the lily stamens ready.
Poinsettia – While I still prefer my technique for making poinsettias this is a good method to learn as well. The poinsettia starts off similar to the lily but then there are more layers of petals. Keeping these even was my main challenge with this flower. Your kit comes with six foil squares but you can make more using thin dollar store aluminum foil (another handy tip from my instructor).
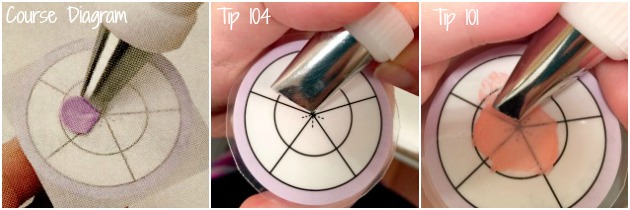
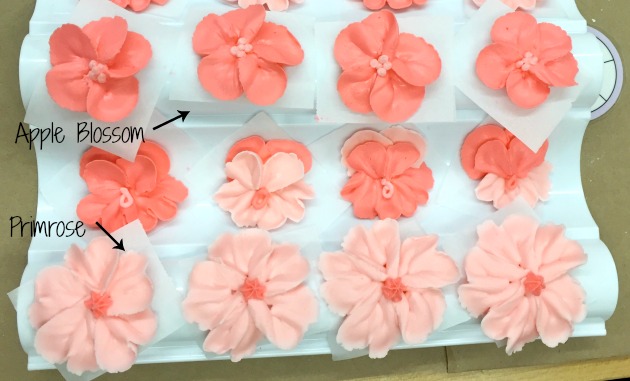
Apple Blossom and Primrose – While we didn’t cover these when we did lesson 1, we did skip back and do them with royal icing. One thing I will point out is that while the manual instructs you to use tip 104, I am convinced they are using tip 101.
So you can experiment using both tips to create blossoms of different sizes. At first I was a bit put off by how large my apple blossoms and primroses were using tip 104 but for my final cake I found they worked very well proportionally.
As for the primrose, the manual suggests making an apple blossom and then piping a different center. My instructor showed me a different (and more authentic) way to do the primrose. While forming each petal, if you bring the tip in a bit and then back out you can create petals that are sort of heart-shaped, just like the primrose. Then you can make the center like they suggest in the manual or use a #14 star tip.
Final Thoughts
While this was a longer class time seemed to fly by. I learned lots of great techniques and I was able to keep up better than I anticipated after lesson 1. I’m really glad my instructor went ahead and taught the rosebud and half rose last week because it really prepared me well for these lessons today. I’ve definitely found learning these techniques with an instructor (rather than just flying solo with a manual) is so informative and very beneficial. I’ve learned so many tips and tricks that I never would have learned otherwise.
I’m very excited for the final class where I get to put it all together creating a floral cake, learn the basket weave technique as well as a few new borders.
Stay tuned for the final post for Course 2 – Lesson 4.

Leave a Reply