Teddy Bear cookies are simply adorable and can be used for a variety of occasions including Valentine’s Day, children’s birthdays, baby showers, or even for someone extra special who loves teddy bears.
I recently announced my second pregnancy to my Facebook friends. Since I’ve been on a cookie and cake decorating kick for the past year I thought it only appropriate to announce this big news with cookies. I made these cute teddy bear cookies along with some baby onesie cookies.
Since we don’t yet know the gender of the baby my plan was to create a gender neutral color scheme. I absolutely adore teal so that was my color of choice for the teddy bears but I can see now that it does look a little bit more ‘boy’ than ‘gender neutral’. I’m very happy with how they turned out but if you’re seeking to duplicate this look with more gender neutral colors then I would suggest trying out Wilton’s Moss Green gel color for a beautiful shade of green (if you’d like to see it in action I used it on this cake here).
Materials for Teddy Bear Cookies
- Sugar Cookie Recipe
- Wilton Baby Theme Cookie Cutters (I used the teddy bear and the onesie cutters).
- Disposable decorating bags and couplers
- Round tips #1 and #2
- Pallet knife and containers to mix icing
- Wilton Gel Colors and Wilton Color Right system
- Edible food markers (I used Wilton fine tip)
- Heart cookie cutter (I used the smallest one from this set)
- Scribe tool (or use a toothpick)
- Royal Icing
Prepare Your Royal Icing
I made one batch of Wilton’s royal icing recipe with the addition of 1 tsp of corn syrup to help boost elasticity. I only made a very small batch of cookies (four onesies and three teddy bears) but I could have easily iced double that amount. I would suggest if you’re making more than 14-15 cookies of this size then you may want more icing.
For the colors I mostly used the gel colors but I’ve listed the Color Right system because it makes creating hard to create colors such as black and red a breeze. But you can absolutely make your black using just the gel color (I find that it takes longer and you have to use a lot of gel coloring which can create a bitter taste).
I mostly used 15 second icing for these bears because it allows you to outline and flood the cookies all in one step. I’m all for saving time. If you’ve never iced cookies before then all you have to do is mix some water into your icing a little at a time to thin. Keep checking using a stopwatch (such as the stopwatch app on your phone) and when a line created in the icing by a toothpick or palette knife disappears in 15 seconds then you have achieved 15 second icing.
Colors for the teddy bear cookies:
- Teal 15 second icing (teal gel color)
- Pale teal 15 second icing (set aside some teal icing and mix it with white icing)
- Magenta 15 second icing (mix pink or rose, no-taste red and a very small amount of teal)
- Black 15 second icing (black from color right system)
- White stiff icing (I like to whiten it using white gel coloring)
- Tan (brown gel color)
Decorate Your Teddy Bear Cookies
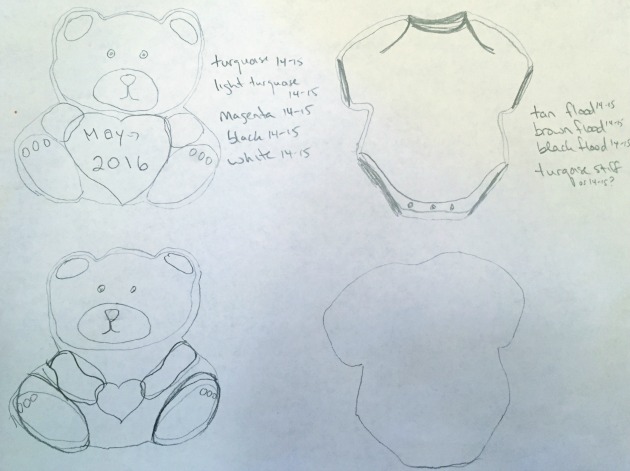
I always think it’s a good idea to start out with some sketches of your cookies so you can play with the design and make sure of spacing before wasting cookies or icing. I traced the cookies onto a sheet of white paper and then tried out some different looks.
I tried both a small heart design without writing which was pretty cute and the larger heart design that could fit some letters or numbers. I decided to just do the design with the larger hearts but for a larger platter of cookies a mixture of the two designs would be appealing.
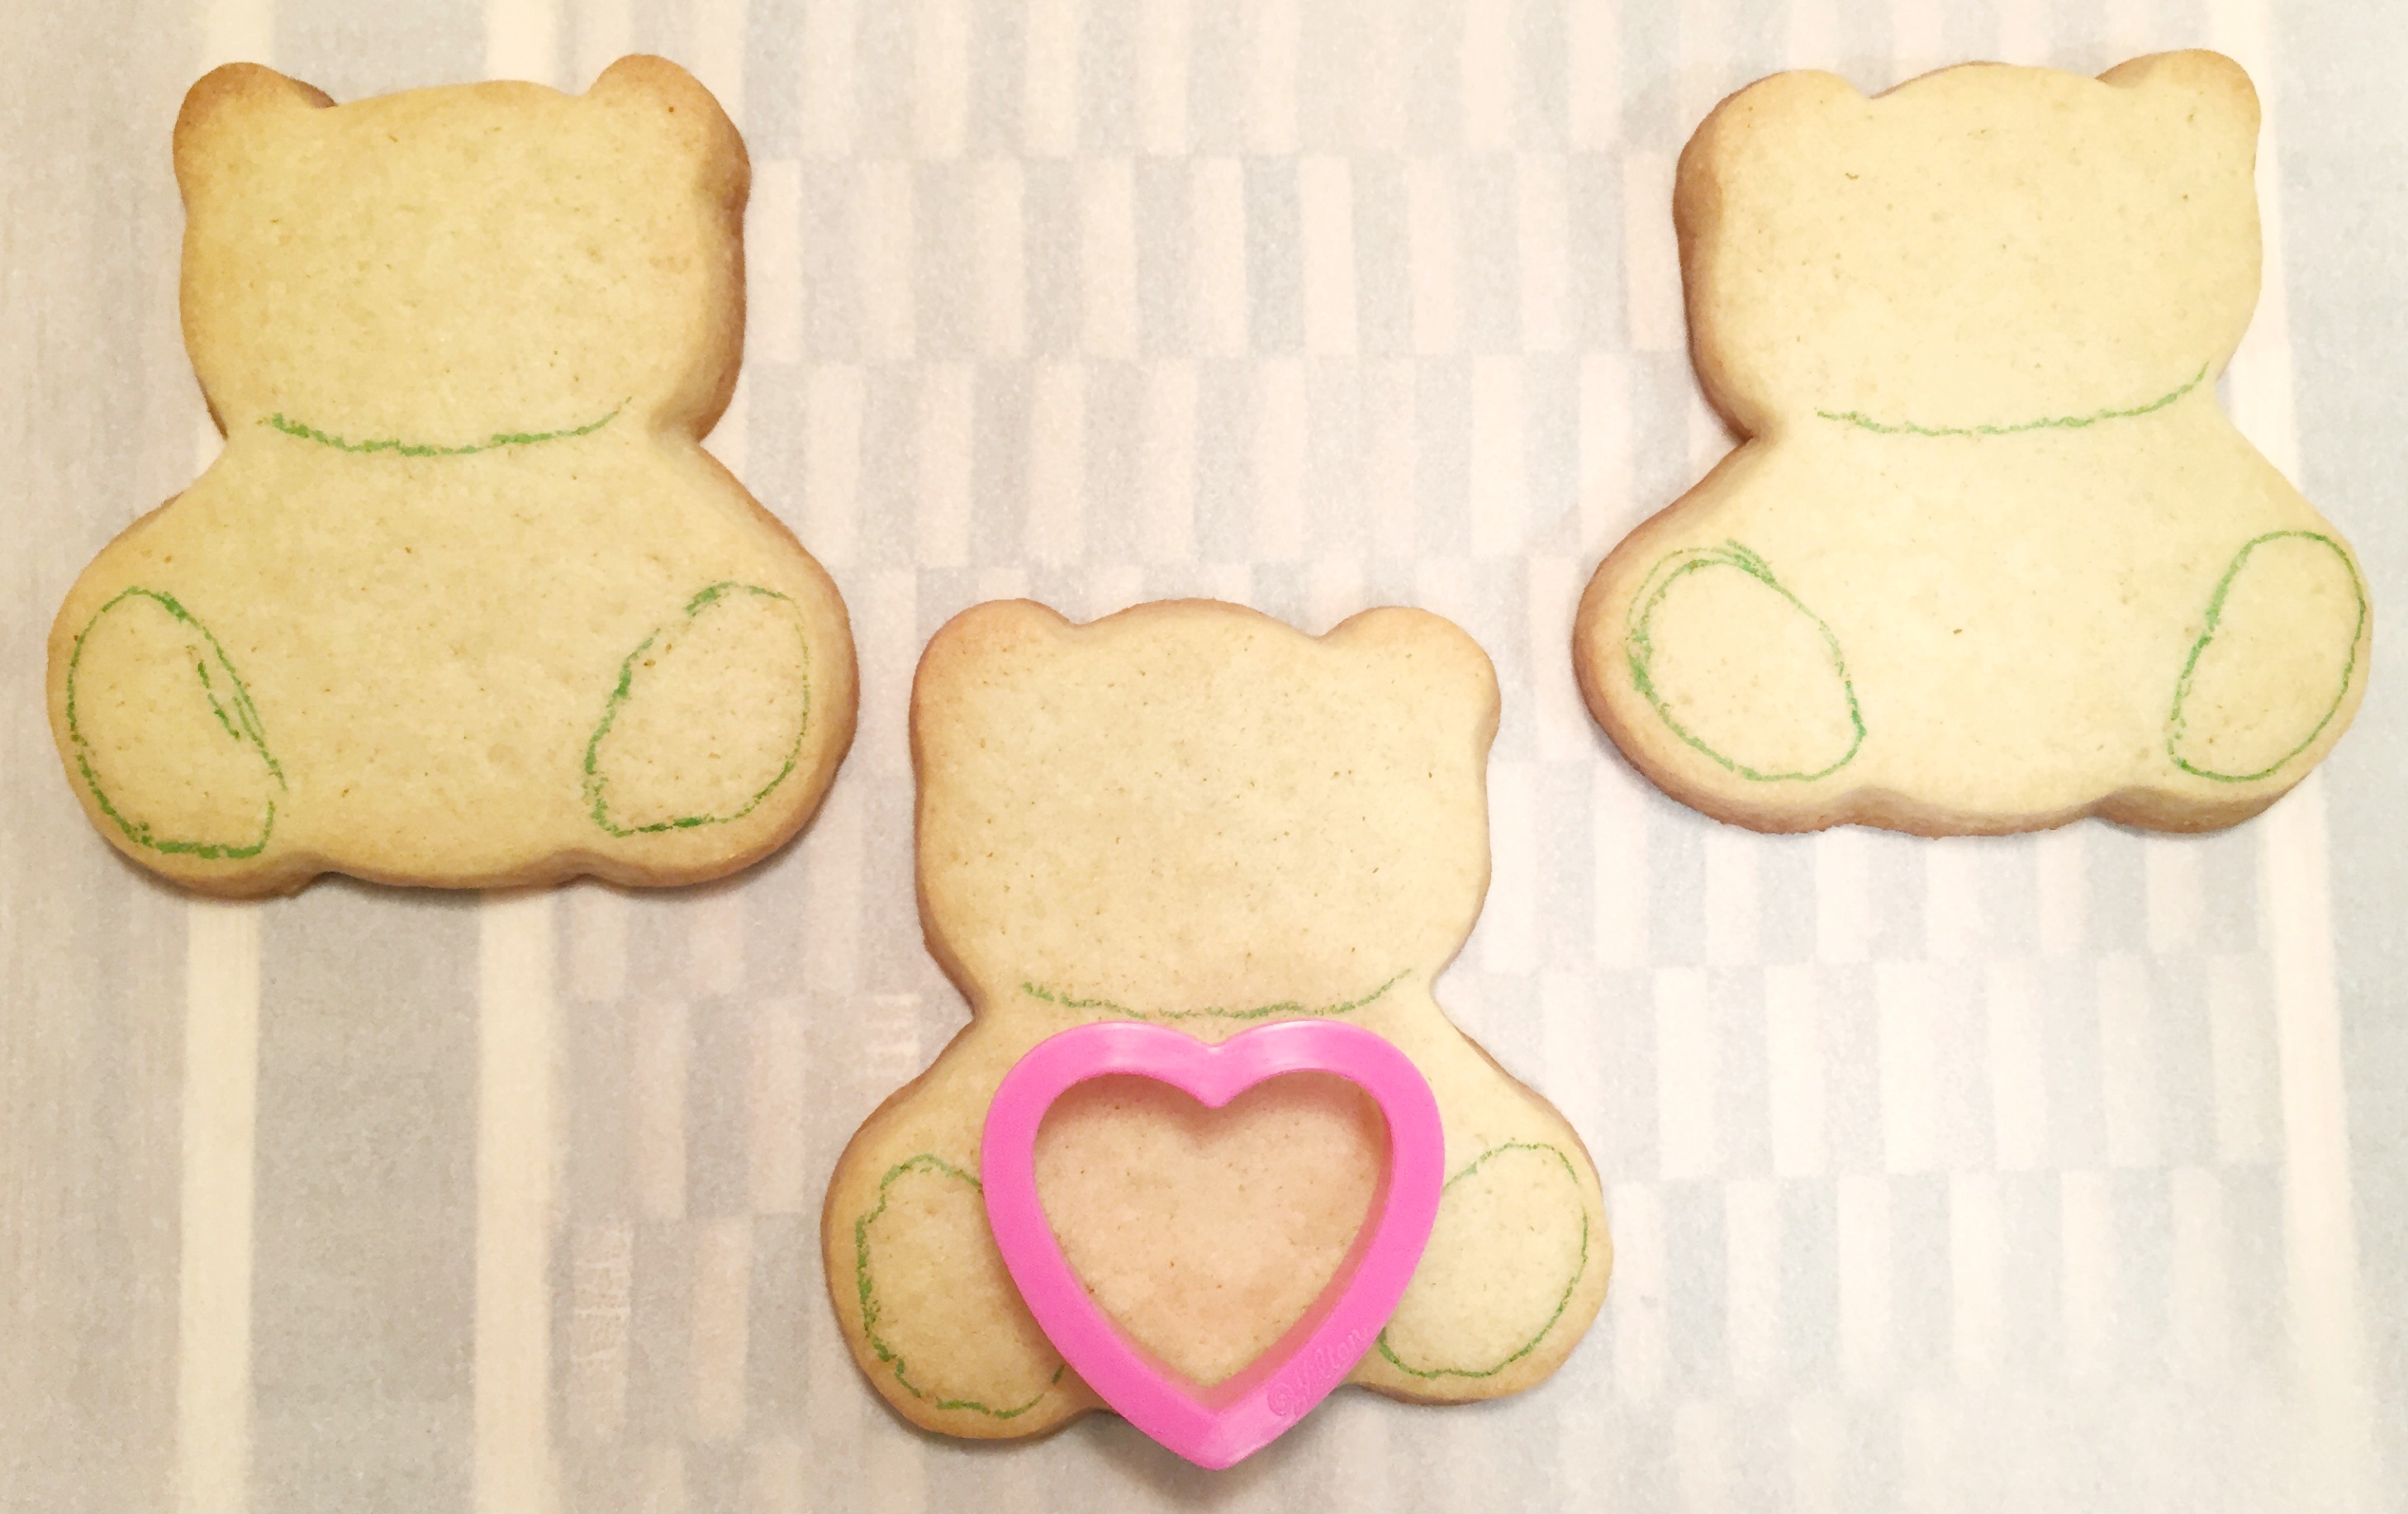
One of the key things I learned from the sketching process was the importance of leaving enough room for the heart. So I used a cookie cutter and edible food markers to sketch in the cookie before icing. I chose to use the green marker because it was closest in color to the teal and if any marker showed through or didn’t get covered completely it wouldn’t be glaringly obvious.
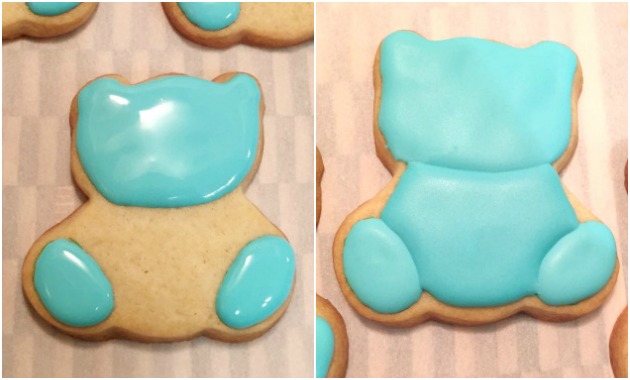
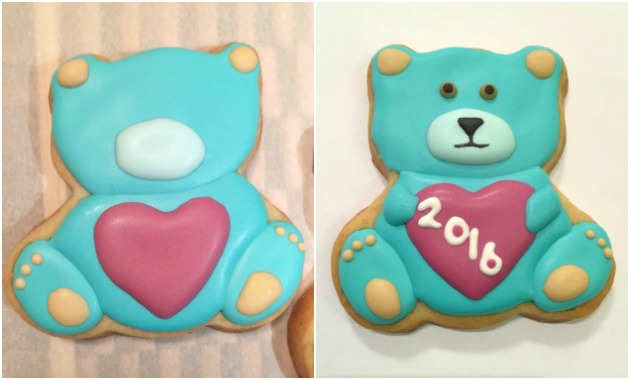
I really wanted there to be some definition between the areas of the teddy bear so I iced the cookie in stages and allowed it to dry for an hour or two between icing sessions. First I iced the head and the feet, then the body. I used a #2 tip for this color and used the scribe tool to help evenly distribute the icing.
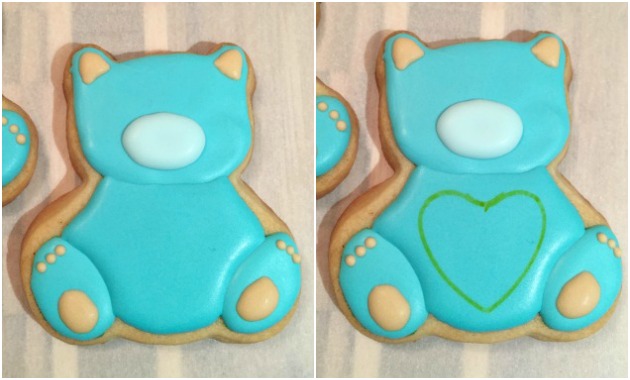
Working from top to bottom (so I didn’t accidentally brush wet icing with my hands) and using a #2 tip I added the tan to the inner ears, the pale teal snout and the tan accents on the feet. After the details had dried, I traced the small heart cookie cutter using the yellow edible food marker. When I made my sketch on paper I traced the outside of the cutter but I decided that that might be too close to the edges so I traced the inside of the heart on the cookie.
To save time you can do the next details again working from the top down. I did it the long way and filled the heart first before doing the other details…
Add the eyes by adding drops of tan with a #2 tip. While this is still wet add a small drop of black on top using a #1 tip. Add a small black line to the snout and shape into an upside down triangle with the scribe tool to create the nose. Dip the scribe tool into the black icing of the nose and use this to create the mouth. I was inspired to create the nose and mouth this way after watching Sweetambs Teddy Bear Cookie tutorial.
Fill in the magenta heart with a #2 tip and wait for it to dry. Then you can add your words or numbers using white stiff icing and a #1 tip. After this has had a chance to dry you can add in the teal teddy bear arms.
Allow your teddy bear cookies to dry for 10 – 12 hours before storing in an airtight container with parchment paper between the layers.
I chose to combine these cookies with some baby onesie cookies but depending on your occasion there are many other cute cookie options that would compliment the teddy bears. Some heart cookies of varying sizes and colors would be very sweet and echo the little heart that the teddy bear is holding.


Leave a Reply