I’m a little late posting this Valentine Cupcake post. I had planned to adapt my favorite strawberry buttercream recipe into a vegan frosting to share with you. I have made vanilla and chocolate vegan buttercream that is out of this world (recipes coming very soon!) and figured it would be simple to make strawberry. Not so much. But if you don’t try new things you don’t learn, right?
I haven’t given up on creating vegan strawberry buttercream but for now I went back to my favorite non-vegan tried, tested and true strawberry buttercream (linked to under ‘materials’). This recipe is so awesome I’ve been craving it for weeks now and Valentine’s Day is certainly a great occasion for strawberry frosting. Since butter doesn’t really give me too many issues (unlike cream cheese or sour cream, yikes) I figured there’s no harm in indulging once in a while.
Chocolate and strawberry are a marriage made in heaven so I knew my cupcakes had to be chocolate. I made up a batch of vegan chocolate cupcakes using a half recipe of the chocolate fudge cake in the Oh She Glows cookbook.
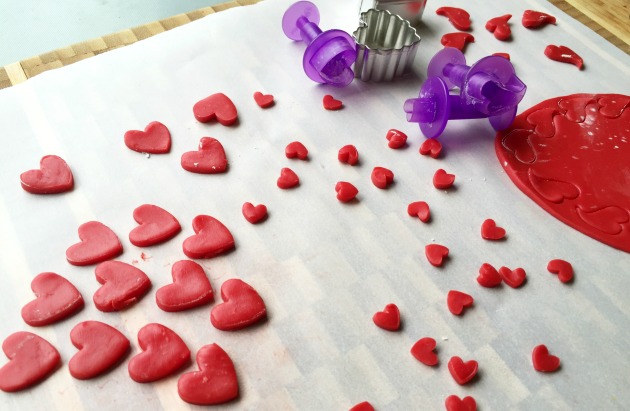
Finally I used red candy clay to make embellishments for the cupcakes. Red candy clay hearts are really easy to make and create a fun look perfect for Valentine’s Day.
Here we go:
Materials
- 12 Cupcakes
- 1 recipe of Strawberry Buttercream (my favorite buttercream!)
- 1/2 recipe for Candy Clay (you will need red candy melts and corn syrup for this)
- Crinkle Heart and Straight Heart Mini Cutters from Wilton Mini Romantic Cookie Cutter Set
- Mini Heart Fondant Cutter Set
- Rolling Pin
- Parchment Paper
- Cornstarch (optional)
- Decorating bags, couplers and tips (I used #32)
Making Candy Clay Hearts
You’ll need to start this part at least a day or so in advance. Because candy clay keeps for weeks you could even do this a week or two in advance and store your hearts between sheets of parchment in an air tight container.
For 12 cupcakes you’ll only need a half recipe so use 6oz of candy melts and 2 tablespoons of light corn syrup. Because red is such a hard color to make, often requiring lots of food coloring, I recommend you save yourself the trouble and buy the red candy melts. Follow the Wilton recipe and then pour your candy clay onto a sheet of cling wrap. Wrap it up so it’s airtight and then place into a plastic container with a lid and store overnight. The clay will firm up overnight but because it’s sealed in an air tight container it won’t dry out.
Take a small section of candy clay and work it between your hands. Your body heat will soften it up a bit so it’s pliable. Next flatten it out onto parchment paper and then give it a final roll with your rolling pin between two sheets of parchment. If your candy clay is too sticky you can dust it with a little cornstarch (if you use too much you can always brush it off with a pastry brush later).
Use your mini cookie cutters and fondant cutters to cut out hearts. You’ll want to let the hearts firm up for about 10 – 15 minutes before moving them. Repeat with the remaining candy clay.
I like to leave the candy clay hearts out on a piece of parchment paper all day and then place another piece of parchment paper on top overnight (to keep dust off and so they aren’t completely exposed to air). Once they are firm enough, a little dry but not dried out, then you can layer them with parchment paper in between and store in an air tight container.
When it comes time for decorating you have two choices. You can place the hearts onto freshly piped buttercream so they stick well or you can wait until the buttercream has chilled in the fridge and place the hearts on top. There are advantages to each. If you are more concerned with the hearts falling off then do the first option. But if you want the freedom to experiment and re-position the hearts without damaging your piping work then chill the cupcakes first.
The final thing to consider is that the presence of moisture will cause the candy clay to ‘sweat’. So, either you can wait until serving to stick on the candy clay hearts, or you can stick them on in advance but not put the cupcakes in an air tight container. (Candy clay on its own in an airtight container is fine).
Decorating Valentine Cupcakes with Candy Clay Hearts
When I first thought about making these cupcakes I chose to use a 2D tip to make a rosette and have the hearts floating on the waves of the rosette. I just love how elegant a 2D rosette looks. But when I piped the design with my failed vegan buttercream I realized the concept was too busy. You couldn’t appreciate the hearts and they detracted from the natural beauty of the 2D rosette. So it was a happy accident that the vegan buttercream was awful because I scraped it all off and began again.
It came to my attention that I’ve never used tip 32 to decorate cupcakes. I think it’s great to challenge yourself to create new designs using tips you’ve never used for a specific purpose. For each of the cupcakes shown below I started off with a very thin crumb coat before piping my designs.
Queen of Hearts Cupcake
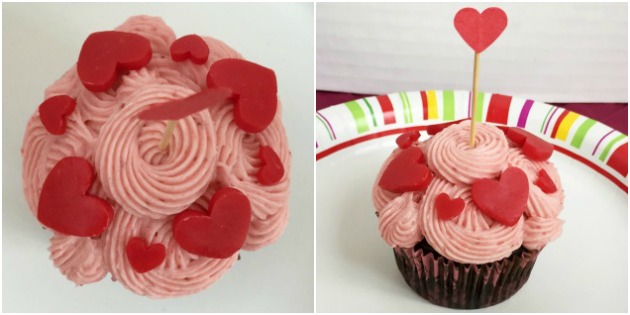
The ‘Queen of Hearts’ cupcake is my favorite of the bunch. I covered the cupcake in rosettes (for those of you that have never made a rosette you hold your piping bag at 90 degrees and start from the center. Continue to 9 o’clock around clockwise through 12, 3 and 6. Finish up somewhere between 6 and 9). In the spaces where I couldn’t fit a rosette I piped a star. I piped an extra rosette on top for added height. Then I added the small and medium hearts from the fondant cutter set and a heart cupcake topper. I just love how elegant and regal this cupcake looks (hence the name).
Lotsa Love Valentine Cupcake
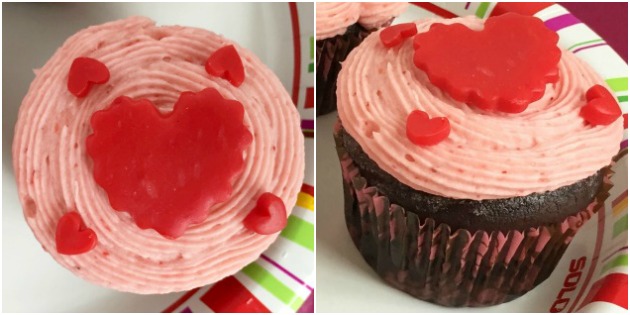
Although I adore the larger hearts from the Romantic Mini Cutter set the main issue I had was that they can cover up a lot of the intricate piping work. So I decided they were best suited to a simple design and made a flat swirl starting from the middle and working towards the outside edge. This way you get the texture of the piping with the 32 tip but you aren’t missing anything if you put big candy clay hearts on top of the cupcake. I topped this one with the large crinkle heart and small hearts from the fondant cutter set. The small hearts are so cute and reminiscent of those fiery little cinnamon hearts (except these have vanilla flavor).
Hearts & Shells Valentine Cupcake
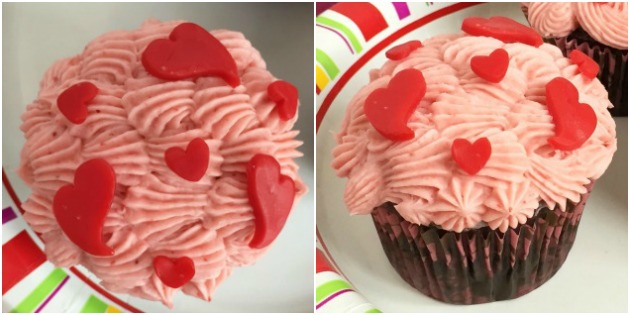
The final cupcake is another favorite of mine. I just love the woven effect of the shells and the whimsical hearts. For this cupcake I started with the middle row. Normally when you make shells you hold your bag at 45 degrees. For the first shell you must start at 90 degrees so the shell will anchor onto the cupcake then you can lower it to 45 degrees while piping your first shell. If you don’t do this the shell won’t form properly. After the middle row is complete you want to turn the cupcake around and do a row on either side (these will be in the opposite direction of your first row). Keep turning the cupcake around to do more rows on either side. Fill in any remaining spaces with stars. Now you can add on your hearts. I used the whimsical hearts and small hearts from the fondant cutter set. A DIY heart cupcake topper wouldn’t be amiss on this cupcake either.
Happy Valentine’s Day!


Leave a Reply