
For the Wilton Course 4 final class you will need to arrive with your cake already covered in fondant. Since you will be spending the entire class adding color dust to your flowers, taping your florist wire and arranging your bouquet, I highly suggest you also complete your border before you come to class.
This is part two of my review. If you haven’t read it yet, you can find part 1 here.
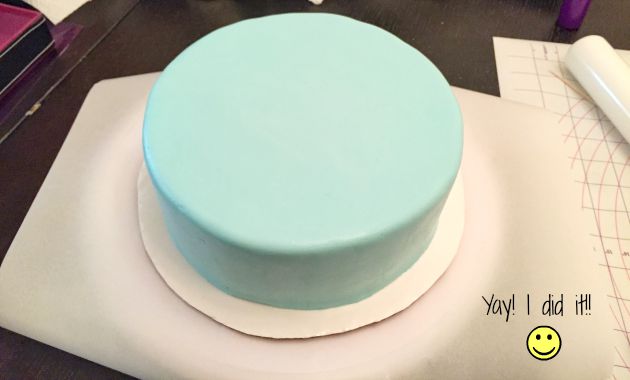
Covering the Cake in Fondant
Those of you who’ve read my course 3 review will be familiar with all the challenges I faced covering my very first cake in fondant. I put all tips from that post to good use and this time it went much more smoothly. Of course that doesn’t mean I wasn’t sweating and my hands weren’t shaking. The first few times covering a cake with fondant are certainly nerve wracking but I can see that it will become easier with time and practice.
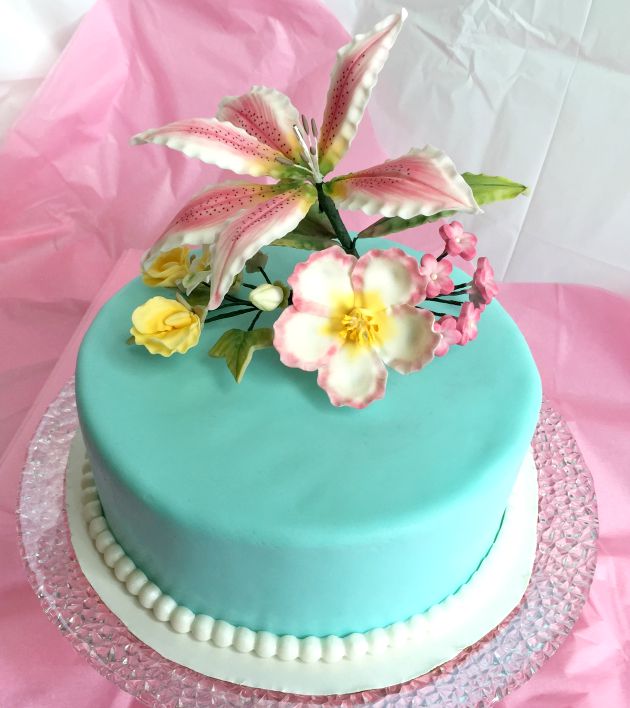
I decided to go with an elegant pearl border that would compliment my cake but not detract from the floral bouquet. I used this silicone mold to create the pearl strands. To give them a pearl-like sheen I dusted the mold before each use with white pearl dust using a brand new paint brush.
I found it easiest to make all the pearl sections first and let them firm up for 15 minutes or so before applying to the cake with edible glue.
To figure out how many strands you need, measure the length of the pearl segment in your mold (7 1/8 inches (or 7.125) for this mold) and then calculate the circumference of your cake (2 x r x π). For my 8″ cake this worked out to 25 inches (2 x 4 x 3.14159) so I needed 3.5 segments (25/7.125). I made a full 4 segments and then cut the last piece to fit. I was lucky and all the pearls fit nicely with no discontinuity. But, if you can’t fit a whole pearl in at the end then this will be the back of your cake.

Coloring Your Flowers and Leaves with Petal Dust
Dusting your floweres and leaves with color dust adds dimension and creates a more realistic look.
You’ll need brand new never-been-used brushes (I bought a set of calligraphy brushes from the dollar store) and a new pallet. Label these so that they are only ever used for cake decorating. The pallet is important so that you don’t contaminate the vials of color and it is great for blending colors.
Lily and Ivy Leaves
The lime green is applied to the main part of the leaf and the spruce green is used in the veins and around the base and edges as an accent color. For the lily leaves you will also add a little deep pink to the base to tie it in with the petals.
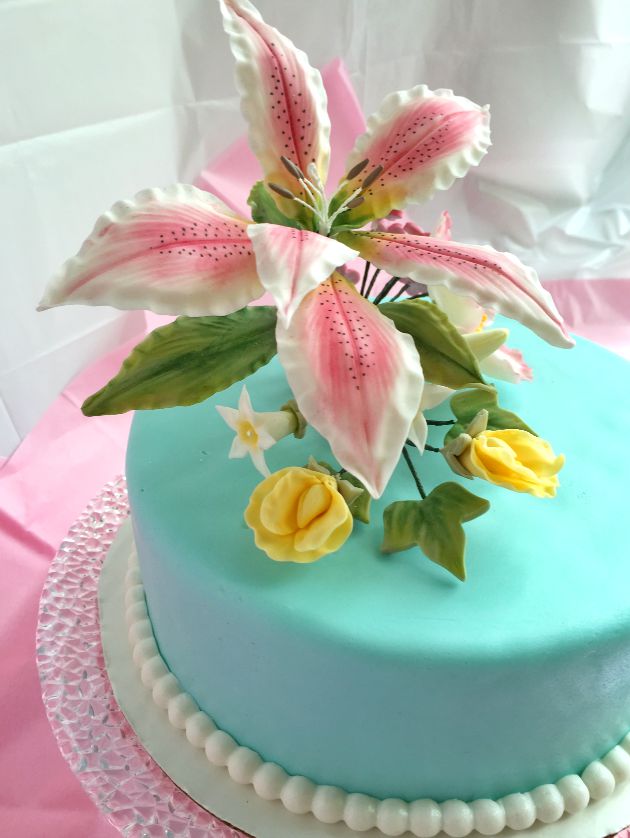
Stargazer Lily
Deep pink is used through the central portion of the petal. Apply a little goldenrod near the base and a small amount of lime green and spruce green near the base to help tie it in with the leaves. Personally, I think the lily looks nicer when you use the green sparingly and don’t go too far up the petal. Otherwise it overpowers the pink. For the finishing touches your instructor will supply the class with a black edible food marker to apply the black accent dots.
Sweet Pea
Depending on what color you’ve chosen for your flower, you can use a corresponding darker color to brush on the petals behind the flower center. In my case I used goldenrod although it didn’t show up very well. A blend of goldenrod and orange may have been better.
Stephanotis
For the blossoms you will brush a little bit of lime green from the calyx up the sides. For the flowers, you will apply a little lime green near the calyx and a bit of goldenrod around the stamen which brings the flower to life.
Blossoms
Brush the tops and sides of the petals with color dust corresponding with your base color (I used deep pink).
Briar Rose
Brush the base of the petals near the stamen with goldenrod. Brush the edges of the petals with deep pink (or another color such as purple if you prefer).
Putting It All Tohether – Assembly
The first thing you need to do is wrap any unwrapped wires with florist tape. This helps prevent them from slipping during assembly. Then you will start assembling the individual flowers together into bunches. For me, the blossoms were bunched together, the sweet peas, ivy and stephanotis formed a second bunch, while the briar rose and stargazer Lily were each on their own.
One tip I can offer is to try to keep the florist tape tight so that it isn’t too thick. The thicker your bunches the more trouble you’ll have getting them to fit into one cake spike.
Of course you could also plan to use more than one cake spike. But think about the composition of your cake. I think it looks nice to have some blank space so that the eye can move around the cake and focus on the individual flowers. If the cake is completely covered in flowers it becomes too busy and overwhelming and your handiwork won’t be appreciated to its fullest.
Inserting the Cake Spike
The cake spike needs to be inserted at an angle towards the center of your cake. You will need to to push much harder than you would think to get through the cake layers.
Once the cake spike is in you can add your flowers one bunch at a time. Since the flowers are on wire you do have quite a bit of flexibility when arranging them. Bend them carefully until they are pleasing to your eye.
Tip 1: Be careful not to puncture your fondant with the flowers. Easier said than done, I have a few marks on my cake 🙂
Tip 2: The tips of flowers such as the stephanotis are very brittle, handle with care.
After the Class
If you know you would like to take photos later on, then you have two options. You can carefully remove your flower bunches from the cake, package them up carefully for transportation and then put them back into the cake spike at home. Or, if you have a tall enough cake carrier you can leave the flowers in but bend them lower down so that they fit under the cake dome. When you’re ready to take photos you can bend them back into position.
I have the Wilton Cake Caddy and my cake was 3″ high. I was able to bend the flowers and “just” get the cake dome on. I don’t think it would have worked with a 4″ tall cake. Since I made a lemon cake with lemon curd between the layers it needed to be refrigerated. I put the whole thing in the fridge overnight and everything was still perfect the next day for my photo shoot.
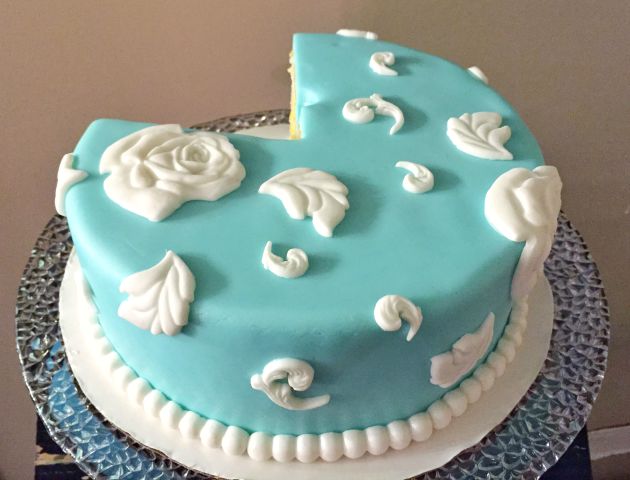
For serving the cake, first I removed the flower bunches and then the cake spike. Then I was able to cut as per usual. Later that night I washed and dried the cake spike and then inserted the flowers back into the spike. Then I put the cake spike bouquet into a glass jar and now have it on display.
Because the cake looked a little plain without the flowers I used white fondant and my silicone mold to add some embellishments to the cake. I dusted the cavities with the icing sugar/cornstarch blend since I wanted them to be matte and not sparkly like the pearls.
Conclusion – Final Thoughts
All in all I thought Wilton Course 4 was an excellent course. Condensed into three weeks I still felt like there was enough time to get everything done. So if you’re doing the regular four week class then you will have more than enough time to get everything done to your liking.
My instructor is a cake rock star and it’s such a pleasure to learn from her. I would highly recommend this class to anyone who wants to take their cake decorating skills to the next level.
However, I’ve just found out that after this summer Wilton is discontinuing this course (which I think is such a shame because it’s a really great class). At my local Michaels they have agreed to run it once more in September so long as there are enough students and enough course kits.
In the future there will be an Advanced Skills project class that delves into the wire flower technique but since I think it’s just a two hour class you won’t learn as much as you would in course 4.
So if you want to take Wilton Course 4 contact your local Michaels or JoAnns to sign up and take advantage of this class while you still can.
Happy Caking 🙂
Leave a Reply